How to connect to the internet using USB with BBB
Description: Set up connection from BBB to host machine to connect internet
Like most makers, the ability to connect your projects to the internet greatly expands its capabilities and whilst the BeagleBone Black development board has an Ethernet jack sometimes it is not always possibly physically to connect your board to the internet. Even with the single USB port taken up by other peripherals a wireless dongle also may not be an option for most users.
So in this blog, i'll show you guys how to connect to internet using only USB for both connection and power.
Get started
The first thing you will need to do is connect your BeagleBone Black board to your computer using the USB port. This should power the board up and also provide communication between the board and your computer. The BeagleBone board should show up on your computer as a USB flash drive. If you haven't done so already you will need to install the serial drivers for your operating system from this flash drive.
Connecting the BeagleBone Black to the Internet via USB Port
The first step you will want to do is make sure the USB connection between the BeagleBone Black and your computer is working ok. The IP address or the Gateway for the virtual network connection over USB is 192.168.7.1 . To test this connection, you can simply issue a ping command from the shell prompt:
1
bone$ ping 192.168.7.1
Now that everything is setup ok, you now need to tell the BeagleBone Black how to connect to the internet. What you need to do is direct any data destined for the internet through a gateway, which is your computer at IP address 192.168.7.1. You can do this by typing the following command in the shell prompt on the BeagleBone Black:
1
bone$ sudo /sbin/route add default gw 192.168.7.1
This now adds the route to the BeagleBone Black’s IP address routing table. Now that you have configured the BeagleBone Black to handle the traffic that passes through you need to Windows how to handle the incoming traffic. This step can easily be done from the Network settings in Windows.
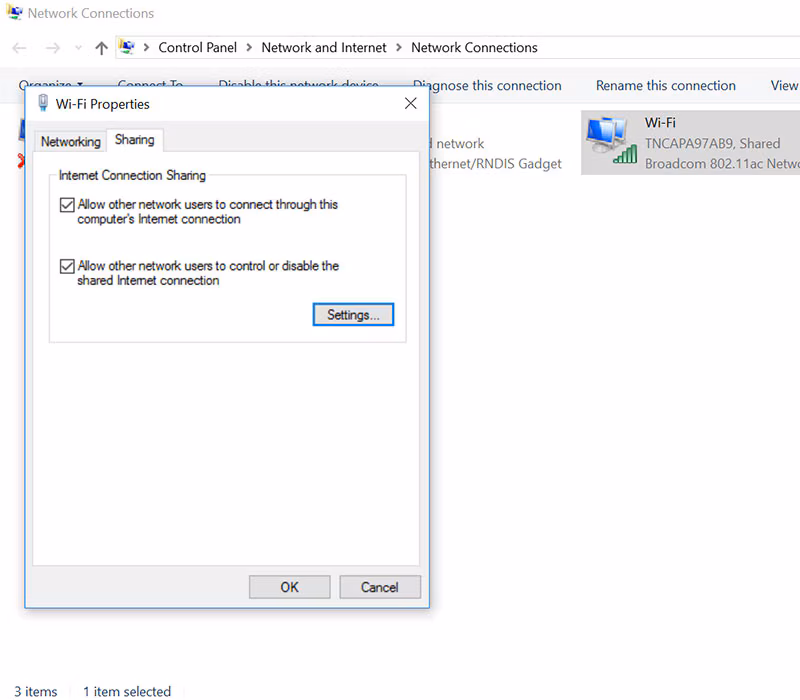
Open up the control panel in Windows and navigate to Network Connection Panel, you should see a list of network devices available such as the figure below. 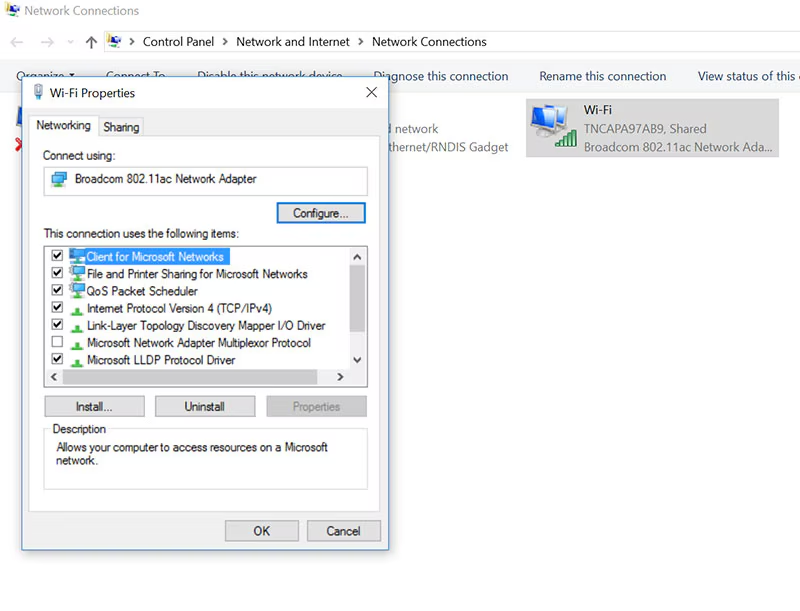 You now need to share this connection with the BeagleBone Black. Click on the Sharing tab at the top and you will see the sharing options available. Click the check box that says “Allow other network users to connect through this computer internet connection”, then click ok.
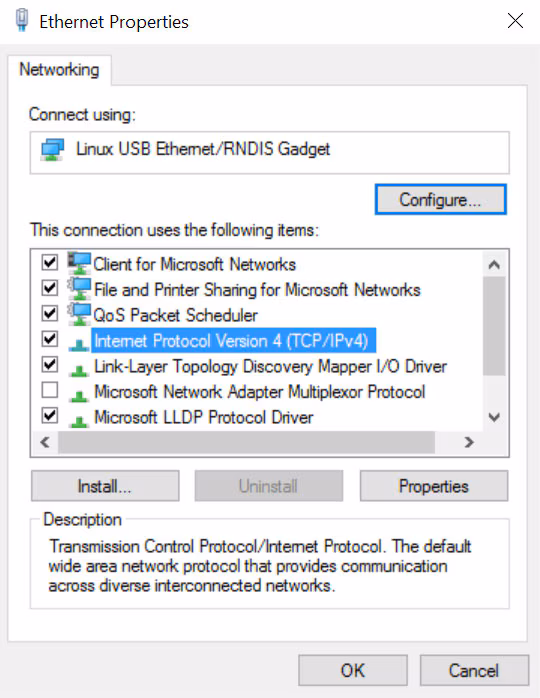
Now that your Internet is shared on your wireless or wired network device you need to manually change the IP address and its settings on the BeagleBone USB network device, which you can see in the network connections window as shown in Figure 4. You should see a network adaptor labelled “Linux Ethernet/RNDIS Gadget” and you need to right click and go to properties.
Click on the “Internet Protocol Version 4 (TCP/IPv4)” from the list and then click Properties. In this next window you will need to manually add the IP address of the gateway, which is your computer. We know that the IP address is 192.168.7.1 as we mentioned before. Add this into the IP address box along with the other network settings as shown in the figure below. 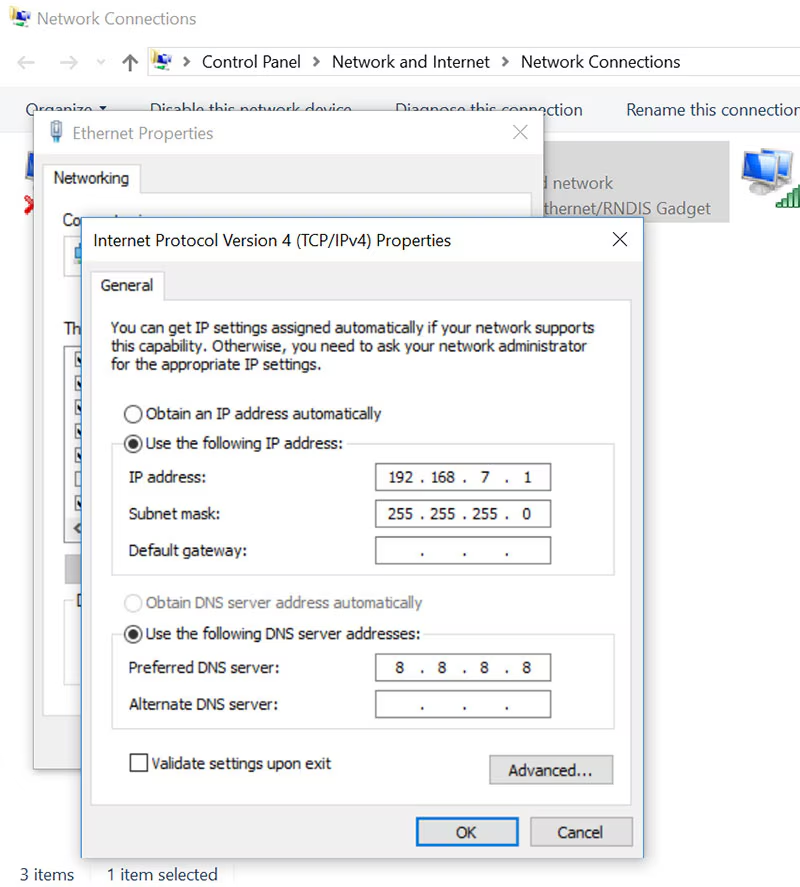 At this point you should have noticed that the SSH connection has closed between the BeagleBone Black and your computer due to the network connection resetting. Just restart PuTTY and connect to the IP address 192.168.7.2 and login same as before. Now the internet is working but you still need to add a name server to translate the IP addresses into names and vice versa. You can do this by typing the following command on the BeagleBone:
1
bone$ echo "nameserver 8.8.8.8" | sudo tee -a /etc/resolv.conf
This command adds the google name server IP address to the config file. You can now test the internet connection using a simple ping test to a web URL such as google.com:
1
bone$ ping google.com
You should receive a positive response from the web URL server. Now that you are connected to the Internet you can run updates and install any software as required.