Raspberry Pi Pico
The aim of this series is to provide easy knowledge that anyone can dive into. In this series, i will give examples in programming Pico MCU in C/C++ lang. This post helps you to set up the SDK toolchain to use VScode for C/C++ development.
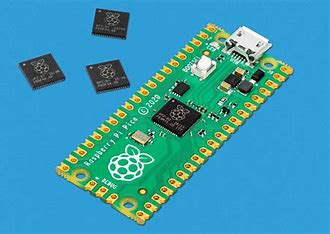
raspberry-pi-pico
Raspberry Pi Pico is a low-cost, high-performance microcontroller board with flexible digital interfaces. Some keys features include:
- RP2040 microcontroller chip designed by Raspberry Pi in the UK
- Dual-core Arm Cortex M0+ processor, flexible clock running up to 133Mhz
- 264KB of SRAM, and 2MB of on-board flash memory
- USB 1.1 with device and host support
- Accelerated floating-point libraries on-chip
- Drag-and-drop programming using mass storage over USB
C/C++ SDK programming
The SDk is the most conservative way of programming the RP2040-based microcontrollers. Embedded-C prog gives you highest level of control over your embedded software behavior and performance.
RP2040 Hardware Architecture
The RP2040 microcontrollers, like most others, has internal RAM, flash, IOs, Peripherals, and DMA. with a dual-core ARM Cortex-M0+ processors. 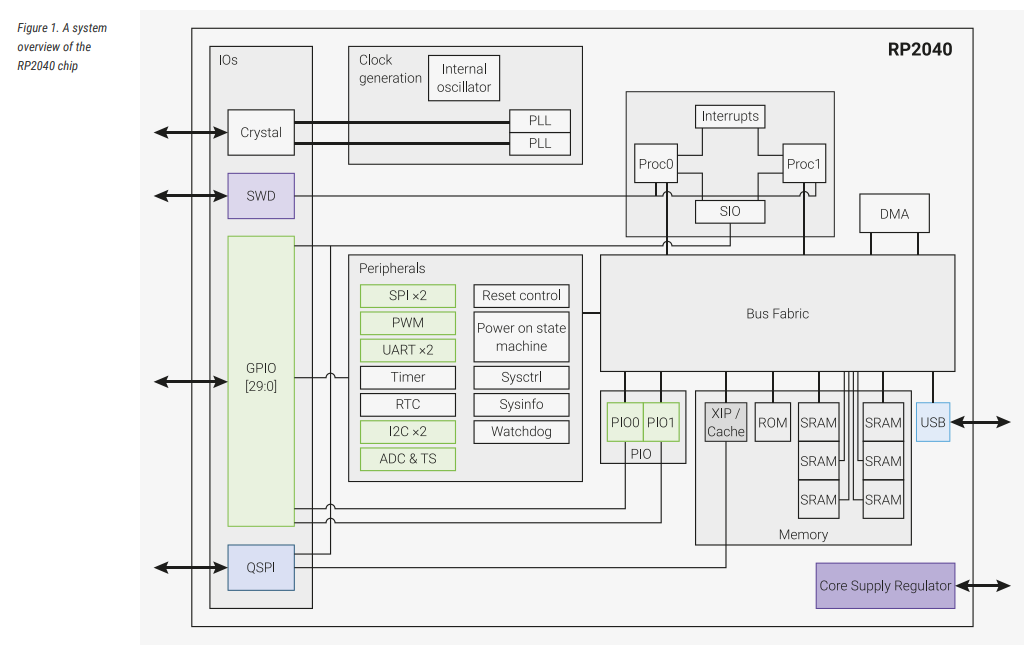
SDK overview
The C/C++ SDK consists of multuple low-level device drivers and hardware abstraction drivers which’re built on top of the low-levels drivers.
The SDK is designed to provide an API and programming environment that is familiar both to non-embedded C developers and embedded C developers alike. A single program runs on the device at a time with a conventional main() method. Standard C/C++ libraries are supported along with APIs for accessing the RP-series microcontroller’s hardware, including DMA, IRQs, and the wide variety fixed function peripherals and PIO (Programmable IO).
The SDK can be used to build anything from simple applications, fully-fledged runtime environments such as MicroPython, to low level software such as the RP-series microcontroller’s on-chip bootrom itself.
The design goal for entire SDK is to be simple but powerful!
Build systems
Cuz there’s no IDE for developing embed-C projects based on RP2040 microcontrollers. That means we’ll have to install some tools which create a environment for building apps like CMake, compiler flags, build tools,…
And the Pico’s SDK uses CMake to manage project builds. Each project will have a file called CMakeLists.txt, which specifies the header files, source files and any other configurations for the build process that the project need.
Installing Pi Pico SDK Toolchain
Now, we need to install the toolchain to start developing our first project. My settings based on Ubuntu 22.04.
Make sure you have installed build-essential package in your system.
1
2
sudo apt update
sudo apt install -y build-essential
then, you need to install Git, CMake
1
2
sudo apt install -y git
sudo apt install -y cmake
and about ARM GNU toolchain, you need to run the below command.
1
2
3
4
5
6
ARM_TOOLCHAIN_VERSION=$(curl -s https://developer.arm.com/downloads/-/arm-gnu-toolchain-downloads | grep -Po '<h4>Version \K.+(?=</h4>)')
curl -Lo gcc-arm-none-eabi.tar.xz "https://developer.arm.com/-/media/Files/downloads/gnu/${ARM_TOOLCHAIN_VERSION}/binrel/arm-gnu-toolchain-${ARM_TOOLCHAIN_VERSION}-x86_64-arm-none-eabi.tar.xz"
sudo mkdir -p /opt/gcc-arm-none-eabi
sudo tar xf gcc-arm-none-eabi.tar.xz --strip-components=1 -C /opt/gcc-arm-none-eabi
echo 'export PATH=$PATH:/opt/gcc-arm-none-eabi/bin' | sudo tee -a /etc/profile.d/gcc-arm-none-eabi.sh
source /etc/profile
Now, clone the SDK repository
1
sudo git clone https://github.com/raspberrypi/pico-sdk.git /opt/pico-sdk
Initialize submodules:
1
sudo git -C /opt/pico-sdk submodule update --init
Set the PICO_SDK_PATH environment variable, which specifies where SDK is installed:
1
echo 'export PICO_SDK_PATH=/opt/pico-sdk' | sudo tee -a /etc/profile.d/pico-sdk.sh
To make changes to take effect, logout and login to your system or run the following command to apply the changes immediately:
1
source /etc/profile.d/pico-sdk.sh
Build program
Create a new directory to store project files and navigate to this directory:
1
2
mkdir helloworld
cd helloworld
create a main.c file:
1
vi main.c
When main.c is opened, copy the below code into it:
1
2
3
4
5
6
7
8
9
10
11
12
#include <stdio.h>
#include <pico/stdlib.h>

int main()
{
    stdio_init_all();

    while (true) {
        printf("Hello world\n");
        sleep_ms(1000);
    }
}
Create a CMake file:
1
vi CMakeLists.txt
Add the following contents:
1
2
3
4
5
6
7
8
9
10
11
12
13
14
15
16
17
18
19
cmake_minimum_required(VERSION 3.13)

include($ENV{PICO_SDK_PATH}/external/pico_sdk_import.cmake)

project(main C CXX ASM)

set(CMAKE_C_STANDARD 11)
set(CMAKE_CXX_STANDARD 17)

pico_sdk_init()

add_executable(${PROJECT_NAME} main.c)

pico_add_extra_outputs(${PROJECT_NAME})

target_link_libraries(${PROJECT_NAME} pico_stdlib)

pico_enable_stdio_usb(${PROJECT_NAME} 1)
pico_enable_stdio_uart(${PROJECT_NAME} 0)
Create a build directory and navigate into it:
1
2
mkdir build
cd build
Prepare CMake build by running the following command:
1
cmake ..
Now run the make command to build program:
1
make -j$(nproc)
using the ls command, you can see a list of generated files:
1
2
CMakeCache.txt  cmake_install.cmake  generated  main.bin  main.elf      main.hex  pico-sdk
CMakeFiles      elf2uf2              Makefile   main.dis  main.elf.map  main.uf2
The main.uf2 is a prog which you should move into storage of the Raspberry Pi Pico.
Upload firmware
Hold down the BOOTSEL button and connect the Raspberry Pi Pico to your PC via micro USB cable. Once Pico is connected, release the BOOTSEL button. This button puts Raspberry Pi Pico into USB mass storage device mode.
Find the USB mass storage device called RPI-RP2:
1
2
$ sudo blkid -o list | grep RPI-RP2
/dev/sdb1  vfat    RPI-RP2  (not mounted)  0034-04C4
Create a new directory:
1
sudo mkdir /mnt/pico
Mount device to The /mnt/pico directory:
1
sudo mount /dev/sdb1 /mnt/pico
Check files in /mnt/pico:
1
2
$ ls /mnt/pico
INDEX.HTM  INFO_UF2.TXT
copy program into storage device:
1
sudo cp main.uf2 /mnt/pico
Flush memory buffer to the storage device
1
sudo sync
Now the MCU will disconnect and runs the code.
If you want to upload new code to the Raspberry Pi Pico, disconnect it from power and hold down the BOOTSEL button when connecting Pico to power.
Test program
Program prints message to USB CDC. So, you can open the serial port to see messages:
1
sudo screen /dev/ttyACM0 115200
to quit screen session, press Ctrl+A and then .